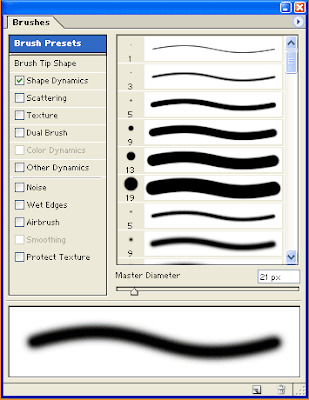
1. To create custom brush characteristics, select a painting tool. By default, the Brushes palette is socked in the Palette Well (on the right-hand side of the Options Bar). Click on the brushes tab to display the Brushes palette.
2. Make sure the Brush presets option is selected. Click on a preset brush in the scroll list. You can rest your cursor on a preset brush in the scroll list to show a help label which indicates the settings currently applied to the brush. Notice that, depending on brush preset you click on, the various customized settings already applied to the brush, visible in the left hand column, change accordingly.

3. To customise the preset brush by adding your own brush settings, removing existing settings or adding new effects, click the check boxes to the left of the brush characteristic labels. The preview pane at the bottom of the palette updates to indicate the effect on the brush of your choices. (In this example the |9-pixel, hard-edged brush is selected, with Scattering and Wet Edges also applied.)
4. Drag the Master Diameter slider to change the size of the brush, or enter a value in pixels in the size entry box.
5. Click on the brush tip shape button to change shape settings such as Angle, Roundness, Hardness and Spacing if required.
6. Click the brush characteristic label (to the right of the check box) to access a range of controls for the option.
7. Create settings for Mode, Opacity and Flow in the Options Bar.
8. If you click on a different brush in the scroll list, any custom settings for the previously selected brush are lost.
9. Position your cursor in the image window, then drag to create the required paint stroke.

No comments:
Post a Comment