Input Levels
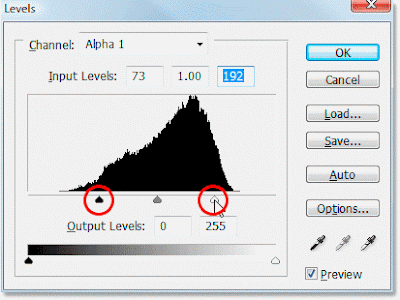
The Input Levels dialogue box (Image>Adjust>Levels) to improve the contrast in a ‘flat’ image.
1. Use the Channel pop-up menu to select a channel. If you do not select an individual channel, you can work on the composite image and affect all channels.
2. To darken an image, drag the sold black slider to the right. Altermatively, enter an appropriate value in the leftmost Input Levels entry box. This maps or clips pixels to black. For example, if you drag the black slider to 15, all pixels with an original value between 0 and 15 become black. The result is a darker image.
3. To lighten an image, drag the hollow, white Input Levels slider to the left. Alternatively, enter an appropriate value in the rightmost Input Levels entry box. The result is to map or clip pixels to white For example, if you drag the white slider to 245, all pixels with an original value between 245 an 255 become white. The result is a lighter image.
The most flexible way of working with Levels, Curves and Color Balance is to set up Adjustment layers (see page 119). Adjustment layers allow you to readjust settings in the respective dialogue boxes until you are satisfied with the result.
Dragging either or both the black or white input levels sliders inwards has the effect of increasing contrast in the image.

No comments:
Post a Comment