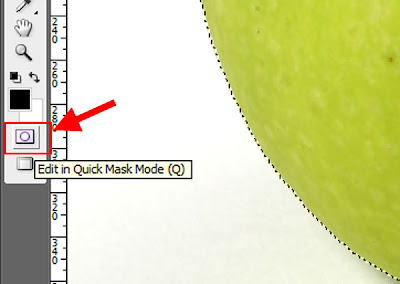
 1. To create a quick mask, click the Quick Mask Mode icon. Make sure that the default foreground and background colours are back and white respectively.
2. Show the brushes palette and choose a brush size. Use a hard-edged brush to create selections with a clearly defined edge. Use a soft-edged brush to create selectins that are slightly softer along the edge. Select a painting tool and drag across your image to ‘paint’ in the mask. Painting with black adds to the mask . Although you see through the 50% red mask, the pixels covered by the mask are completely protected.
3. To remove areas from the mask you can use the Eraser tool, or paint with white.
4. When you are satisfied with your mask, disk the standard mode buttion This turns the areas if the image that were not part of your quick mask into aselection. You can now make changes to the selected areas(in this example the Smart Blur filter has been applied), leaving the areas that were the quick mask unchanged.

No comments:
Post a Comment