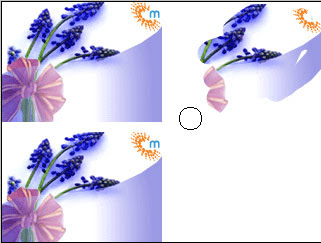
1. To clone an area of your image, select the Clone Stamp tool. Set an appropriate brush size using the Brushes pop-up palette in the Options Bar. Make sure that the Aligned option is selected.

2. Hold down Alt and click on the part of the image you want to clone.

3. Release Alt, Move the cursor to a different image part, then click and drag. The pixels in the image where you drag are replaced by pixels cloned from the spot where you first clicked. A crosshair at the point where you first clicked indicates the pixels that are being cloned – the source point.

Clone – Aligned
With Aligned selected, the distance from the source point (shown by the crosshair) to the Clone Stamp cursor remains fixed. When you can release the mouse, move the cursor, then continue to use the Clone Stamp tool; the relative position of the source point and the Rubber Stamp cursor remains constant, but you will now clone pixels from a different part of the image.
Clone – Non-aligned
With the Aligned option off, the source point – where you first click – remains the same. If you stop dragging with the Clone Stamp cursor, move to a different part of the image, then start dragging again, the pixels you clone continue to come from the original source point.

No comments:
Post a Comment