Using an adjustment layer is like positioning a lens above the pixels on the layers below it to change their appearance. If you don’t like the result, you can edit the adjustment layer to achieve the result you want, or you can discard the adjustment layer. When you are satisfied with the result you can implement the adjustment layer as a permanent change.
1. Select a layer in the Layers palette. The adjustment layer will be positioned above the currently active layer. Choose Layer > New Adjustment Layer.
2. Choose a type from the New Adjustment Layer sub-menu. This automatically becomes the name for the layer. Enter a different name if desired. Set Opacity and Blending Mode at this stage if you want to. Click OK.
3. Depending on the type of adjustment layer you chose, the appropriate dialogue box opens. Create the settings you want to experiment with. OK the dialogue box.
4. The new adjustment layer appears in the Layers palette as the active layer. The settings you created are now applied to all layers below the adjustment layer.
5. Click the Eye icon to hide/show the preview of the changes brought about by the adjustment layer settings. Double-click the adjustment layer to re-enter the appropriate adjustment dialogue box to make changes to the settings.
6. Drag the adjustment layer into the Wastebasket if you want to discard the settings.
7. When you are ready to make the settings of the adjustment layer permanent, either use one of the Merge commands from the pop-up, or flatten the image.

Friday, October 30, 2009
Monday, October 26, 2009
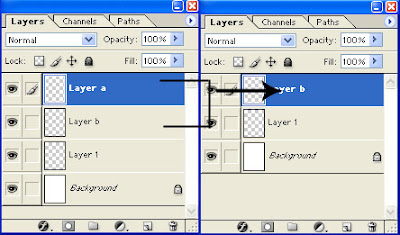
Linking Layers
Linking layers is useful when you want to keep elements of an image on separate layers, but you need to move the layers maintaining the exact positional relationship of each.
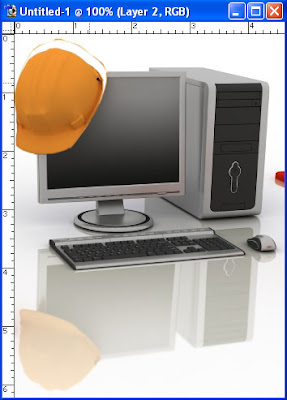
1. To move the foreground object with its shadow (which is on a separate layer), show the Layers palette (Window > Show Layers) and make sure that one of the layers you want to link is active.
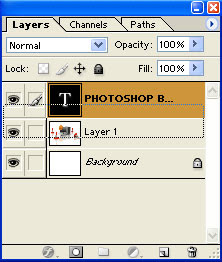
2. Click in the empty box to the right of the Eye icon of the layer you want to link. A Chain icon appears in the box, indicating that the layer is linked. When you make the linked layer active, the Chain and Paintbrush icons switch to indicate the layer you are working on.
3. Use the Move tool to reposition the elements on the linked layers as one.
4. You can link multiple layers using the same technique.
5. To unlink a layer, click the Chain icon. The layer is now completely independent again.
1. To move the foreground object with its shadow (which is on a separate layer), show the Layers palette (Window > Show Layers) and make sure that one of the layers you want to link is active.
2. Click in the empty box to the right of the Eye icon of the layer you want to link. A Chain icon appears in the box, indicating that the layer is linked. When you make the linked layer active, the Chain and Paintbrush icons switch to indicate the layer you are working on.
3. Use the Move tool to reposition the elements on the linked layers as one.
4. You can link multiple layers using the same technique.
5. To unlink a layer, click the Chain icon. The layer is now completely independent again.
Thursday, October 22, 2009
Moving Layers Between Images
You can copy a complete layer from one Photoshop document to another, similar to the way you move a selection from one document to another.
1. First make sure you have two document windows open a ‘source’ document and a ‘destination’ document. The source document contains the layer you want to copy. The destination document is the document into which you want to copy the layer.
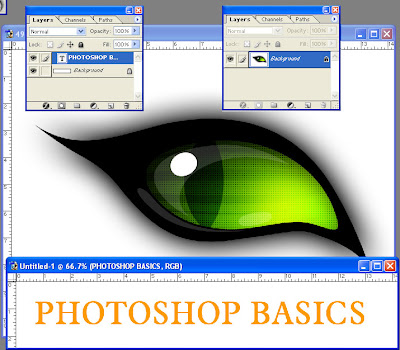
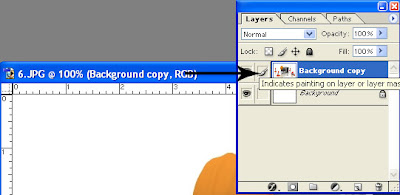
2. Click in the source document window to make it active. Position your cursor on the layer in the Layers palette, then drag the layer you want to copy from the source document into the destination document window. You will see a bounding box indicating the layer you are copying.
3. Position the layer and then release the mouse. The layer is positioned above the previously active layer in the Layers palette of the destination document. The destination document is now the active image window.
BEWARE – the layers you move into the destination image window is rendered at the resolution of the destination window. This may cause the elements on the moved layer to appear larger or smaller than in the original window. To avoid surprises, make sure that the source and destination images are at the same resolution.
Also, if the modes of the two images are different. The layer you move will be converted to match the mode of the destination window.
DON’T FORGET – Use the Defringe command (see http://photoshop-basics.blogspot.com/2009/09/defringe-command.html) to remove any fringe around pixels on a layer that you copy from one image to another.
1. First make sure you have two document windows open a ‘source’ document and a ‘destination’ document. The source document contains the layer you want to copy. The destination document is the document into which you want to copy the layer.

2. Click in the source document window to make it active. Position your cursor on the layer in the Layers palette, then drag the layer you want to copy from the source document into the destination document window. You will see a bounding box indicating the layer you are copying.
3. Position the layer and then release the mouse. The layer is positioned above the previously active layer in the Layers palette of the destination document. The destination document is now the active image window.

BEWARE – the layers you move into the destination image window is rendered at the resolution of the destination window. This may cause the elements on the moved layer to appear larger or smaller than in the original window. To avoid surprises, make sure that the source and destination images are at the same resolution.
Also, if the modes of the two images are different. The layer you move will be converted to match the mode of the destination window.
DON’T FORGET – Use the Defringe command (see http://photoshop-basics.blogspot.com/2009/09/defringe-command.html) to remove any fringe around pixels on a layer that you copy from one image to another.
Monday, October 12, 2009
Merging and Flattening Layers
Use the Merge commands to combine two or more layers into one layer. This is useful for keeping the file size down and for consolidating elements on different layers into a single manageable layer or unit.
1. To merge all the visible layers in your document, first hide any layers you don’t want to merge. Make sure one of the layers you want to merge is active, then choose Merge Visible from the pop-up menu in the Layers palette, or choose Layer > Merge Visible.
2. To merge a layer with the layer below it, first select the layer, then choose Merge Down from the pop-up menu, or choose Layer > Merge Down.(ctrl + E)
Flattening images
When you flatten an image, you end up with a Background layer only. This reduces the file size. Flatten an image when you have finished creating and positioning the elements of your composite image, and are ready to save the file in a suitable format for placing in a page layout application.
1. To flatten an image, make sure that all the layers you want to keep are visible. Choose Flatten Image from the layers palette pop-up menu, or choose Layers > Flatten Image.
1. To merge all the visible layers in your document, first hide any layers you don’t want to merge. Make sure one of the layers you want to merge is active, then choose Merge Visible from the pop-up menu in the Layers palette, or choose Layer > Merge Visible.
2. To merge a layer with the layer below it, first select the layer, then choose Merge Down from the pop-up menu, or choose Layer > Merge Down.(ctrl + E)

Flattening images
When you flatten an image, you end up with a Background layer only. This reduces the file size. Flatten an image when you have finished creating and positioning the elements of your composite image, and are ready to save the file in a suitable format for placing in a page layout application.
1. To flatten an image, make sure that all the layers you want to keep are visible. Choose Flatten Image from the layers palette pop-up menu, or choose Layers > Flatten Image.
Sunday, October 11, 2009
Working With Layers
To access the Layers palette, choose Window > Show Layers.
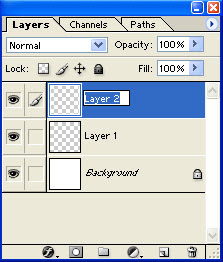
1. To create a new layer, choose New Layer from the palette’s pop-up menu. Enter a name for the layer in the New Layer dialogue box. You can also choose Opacity and Blending Mode settings at this stage if you want to.
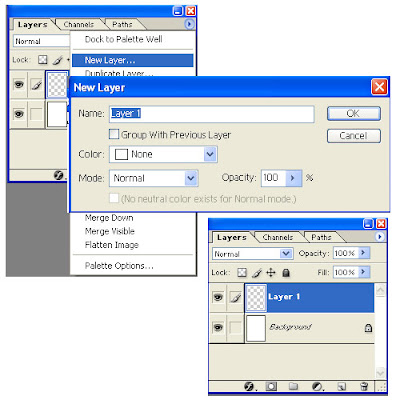
2. Alternatively, click once on the New Layer icon at the bottom of the Layers palette.
3. Ok the dialogue box, or press Return/Enter. The new layer appears in the Layers palette above the previously highlighted layer. Notice also that the file size in the Document Sizes status bar area increases when you paint on or add pixels to the layer.
4. To rename a layer, position your cursor on the layer’s label, then double-click. Enter a new name in the label entry area, and then press Enter/Return on the keyboard.
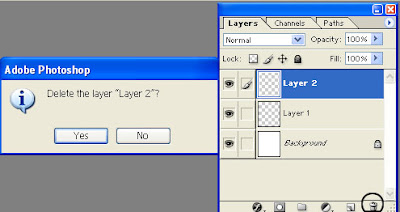
5. To delete a layer, click on the layer to select it. Then choose Delete Layer from the pop-up menu in the Layer palette. Click Yes or No in the Delete Layer warning box. Alternatively, drag the Layer name onto the Wastebasket icon at the bottom of the Layers palette. No warning alert appears if you use this method.
Selecting, hiding and showing layers
You can only work on one layer at a time. This is often referred to as the ‘target’ or active layer.
1. Click on the layer name in the Layers palette to make it active. The layer name will highlight and the Paintbrush icon will appear in the second column on the left on the palette. The name of the active layer appears in the title bar of the image window.
2. To hide a layer, click on the Eye icon in the leftmost column of the Layers palette. To show layer, click in the leftmost column to bring back the Eye icon.
Reordering layers
It is often necessary to reorder the stacking position of layers to control which layers appear in front of other layers.
1. To change the layering order, click and drag the layer name you want to reposition. Notice the horizontal bar that appears as you move the layer upwards or downwards. Release the mouse when the horizontal bar appears in the position to which you want the layer moved.
Repositioning layer contents
You can reposition the entire contents of a layer using the Move tool.
1. Click on the layer you want to move in the Layers palette. Select the Move tool, then position your cursor anywhere on the image. Click and drag to move the layer.
1. To create a new layer, choose New Layer from the palette’s pop-up menu. Enter a name for the layer in the New Layer dialogue box. You can also choose Opacity and Blending Mode settings at this stage if you want to.

2. Alternatively, click once on the New Layer icon at the bottom of the Layers palette.
3. Ok the dialogue box, or press Return/Enter. The new layer appears in the Layers palette above the previously highlighted layer. Notice also that the file size in the Document Sizes status bar area increases when you paint on or add pixels to the layer.
4. To rename a layer, position your cursor on the layer’s label, then double-click. Enter a new name in the label entry area, and then press Enter/Return on the keyboard.

5. To delete a layer, click on the layer to select it. Then choose Delete Layer from the pop-up menu in the Layer palette. Click Yes or No in the Delete Layer warning box. Alternatively, drag the Layer name onto the Wastebasket icon at the bottom of the Layers palette. No warning alert appears if you use this method.

Selecting, hiding and showing layers
You can only work on one layer at a time. This is often referred to as the ‘target’ or active layer.
1. Click on the layer name in the Layers palette to make it active. The layer name will highlight and the Paintbrush icon will appear in the second column on the left on the palette. The name of the active layer appears in the title bar of the image window.

2. To hide a layer, click on the Eye icon in the leftmost column of the Layers palette. To show layer, click in the leftmost column to bring back the Eye icon.
Reordering layers
It is often necessary to reorder the stacking position of layers to control which layers appear in front of other layers.
1. To change the layering order, click and drag the layer name you want to reposition. Notice the horizontal bar that appears as you move the layer upwards or downwards. Release the mouse when the horizontal bar appears in the position to which you want the layer moved.

Repositioning layer contents
You can reposition the entire contents of a layer using the Move tool.
1. Click on the layer you want to move in the Layers palette. Select the Move tool, then position your cursor anywhere on the image. Click and drag to move the layer.

Saturday, October 10, 2009
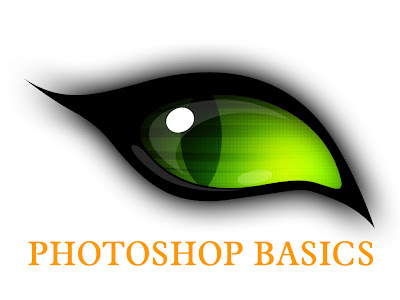
Layers
Layers introduce a considerable degree of flexibility into the way in which you can work with images. Layers let you keep various image elements separate so that you can make changes without deleting or changing the underlying pixels.
Each additional layer you create increases the file size of the image. You can selectively merge layers into each other to help manage and consolidate layers as you work. When you have finished editing your image, you can flatten the image to merge all layers into a single Background layer. You will need to do this to use your image in QuarkXPress or Adobe InDesign. You should note that you can only save images with layers in Photoshop and TIFF file formats.
Covers
Working with Layers
Merging and Flattening Layers
Moving Layers Between Images
Linking Layers
Adjustment Layers
Locking Layers
Layer Sets
Layer Styles
Managing Layer Styles
Transforming Layers
New Layer Commands
Monday, October 5, 2009
Transforming Selections
The ability to transform a selection’s bounding box enables you to fine tune selections, distort selections and make selections that were previously difficult to achieve.
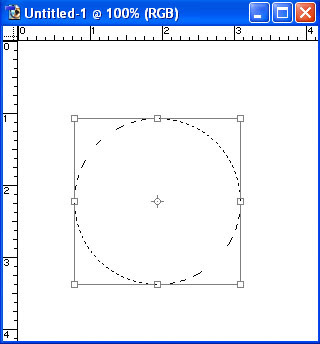
1. To transform a selection, choose Select > Transform Selection. A bounding box with eight handles appears around the selection. A Point of Origin marker appears at the center of the bounding box.
2. To scale a selection, click and drag a handle. The cursor becomes a bidirectional arrow. To scale a selection in proportion, hold down Shift then drag a handle.
3. To rotate a selection, position your cursor just outside the selection border. The cursor changes to a bi-directional, curved arrow. Click and drag in a circular direction.

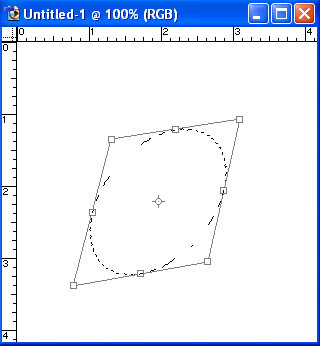
4. To distort the selection boundary, hold down Command/Ctrl then drag a corner handle.
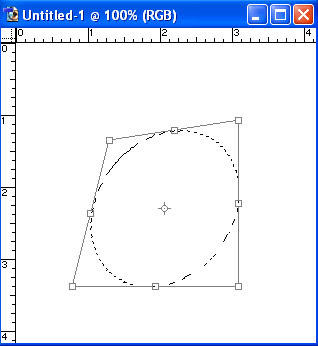
5. To create a perspective effect on the selection border, hold down Command/Ctrl+Alt+Shift, then drag a corner handle.

6. To shear a selection border, hold down Command/Ctrl, then Click and drag a centre top/bottom or centre left/right handle.
7. Press the Esc key to remove the transform bounding box without applying any of the changes. Press Return/Enter, or double-click inside the bounding box to accept the transformation.
1. To transform a selection, choose Select > Transform Selection. A bounding box with eight handles appears around the selection. A Point of Origin marker appears at the center of the bounding box.
2. To scale a selection, click and drag a handle. The cursor becomes a bidirectional arrow. To scale a selection in proportion, hold down Shift then drag a handle.

3. To rotate a selection, position your cursor just outside the selection border. The cursor changes to a bi-directional, curved arrow. Click and drag in a circular direction.

4. To distort the selection boundary, hold down Command/Ctrl then drag a corner handle.

5. To create a perspective effect on the selection border, hold down Command/Ctrl+Alt+Shift, then drag a corner handle.

6. To shear a selection border, hold down Command/Ctrl, then Click and drag a centre top/bottom or centre left/right handle.

7. Press the Esc key to remove the transform bounding box without applying any of the changes. Press Return/Enter, or double-click inside the bounding box to accept the transformation.
Subscribe to:
Posts (Atom)